A morbic 12 in the bay of biscay
|
Just an update on the boat construction. So far the hull is glued, just in need of some external fairing and epoxy sealing of plywood edges. As a newbie i have a lerning process that almost complete when glueing the last strake. I think I will have to build another boat, now that I know how to do it… tempting.
I also worked on the rudder, tiller, centerboard and centerboard case. As I don’t like the idea of buying a expensive 14 mm brass rod to use just a 4 cm for the centerboard pivot, I made a 10 mm wooden rod and wrapped in glass fiber and epoxy. I’m not sure how will it work. For the rudder I also took a different approach from the project: i will make the rudder case fixed, permanently glued, and have a bronze bolt as a pivot. I will use the same wooden rod with fiberglass and epoxy, but drilled inside, to leave only the fg skin, to act as a sleeve inside to adsorb the compression from the bolt, thus enabling the rudder blade to pívot freely. I also routed a channel under the tiller space to get the rope to lift the rudder blade inside the boat. Also did a fancy head for the tiller. All in all… enjoying the build!! 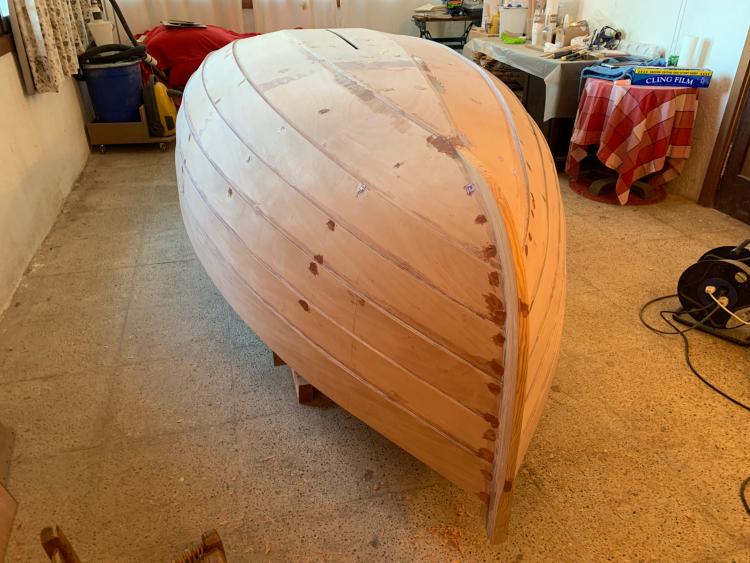 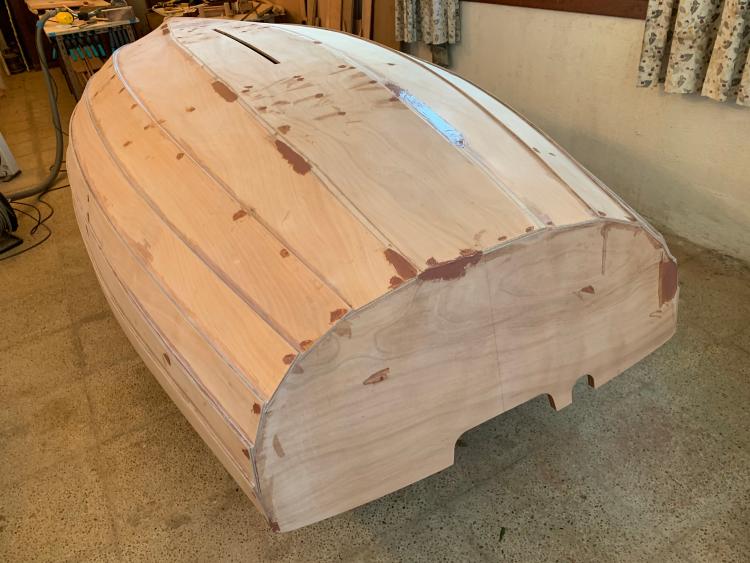 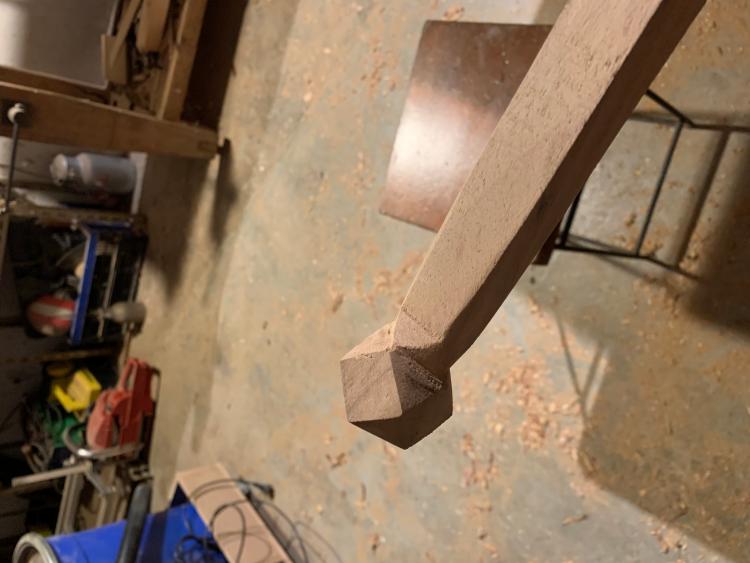 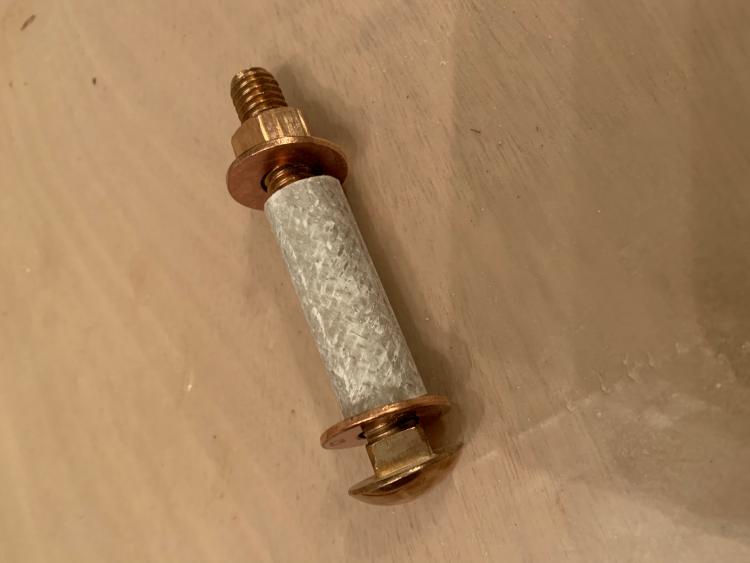 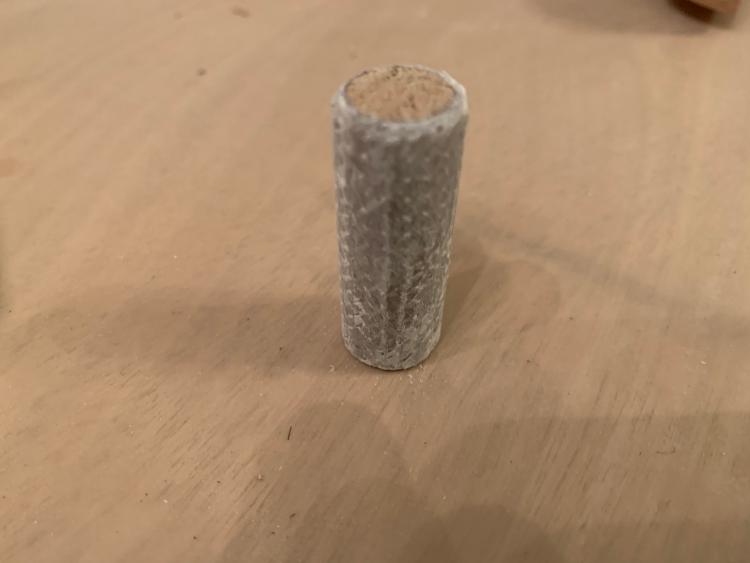 |
|
Administrator
|
Hi Magaliatres.
Nice record and pics. Skills perfected by the time one has done the final strake - Many of us found the same! Some interesting techniques you've adopted. FWIW:- Centreboard pivot - We bought a stainless bolt and cut it down to be a rod. Rudder pivot - Let us know how you get on with it. At least one Morbic sailor experienced partial failure of the rudder stock which he resolved. We heard about it in time to use screws from both sides of the stock into the (Vivier-specified) wooden disk pivot. |
Re: A morbic 12 in the bay of biscay
|
This post was updated on .
Hi, I’m continuing with the build, and come across to the point of glueing the centerboard case to the hull. I understand this joint should be watertigh so I would lay down a generous bed of thickened epoxy and then low the centerboard assembly over it. But due to the shape of the main bulkhead slot in inverted T shape, that is not possible. Instead it has to slide from the bow downwards, so it seems very tricky to get a uniform epoxy bead underneath the centerboard case logs. How have other morbic builders solved this issue?
The slot in the hull is narrower and shorter than the slot in the case. Have you let the epoxy cure, and clean flush with a router after that, or have you raised the boat, got underneath and remove excess epoxy when still fresh? All your thoughts will be most appreciated? Thanks!!! Best regards, Carlos Herrán 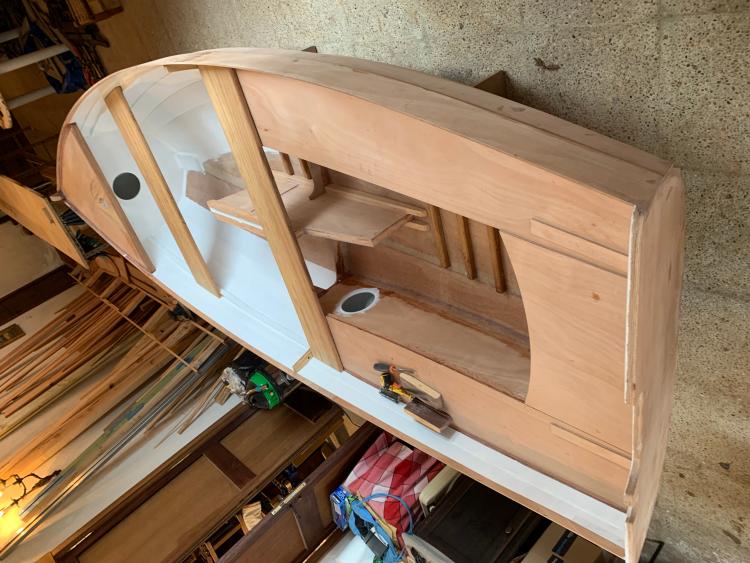 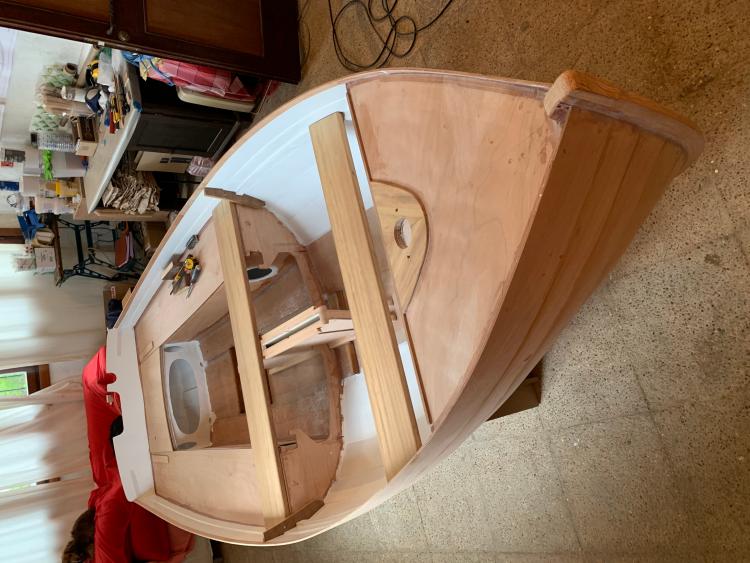 |
Re: A morbic 12 in the bay of biscay
|
I had the same doubts as you and it took me a long time to take the plunge. After dry-fitting, I applied a thick bed of epoxy, but not too much. I took a syringue with semi-thickened epoxy and injected as much as possible under the logs. I let the epoxy dry and widened the slot with a router after turning the hull, but to be honest, I'm still not 100% sure if everything is ok now...
|
Re: A morbic 12 in the bay of biscay
|
Have Faith Gentlemen.
Here are a couple of photos of my CB case being fitted. 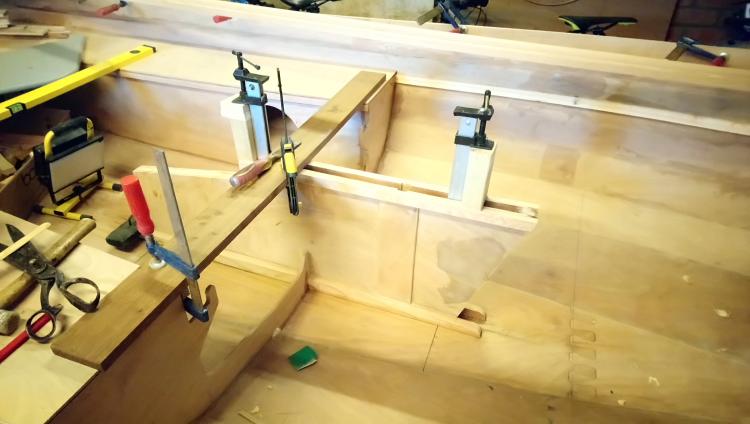 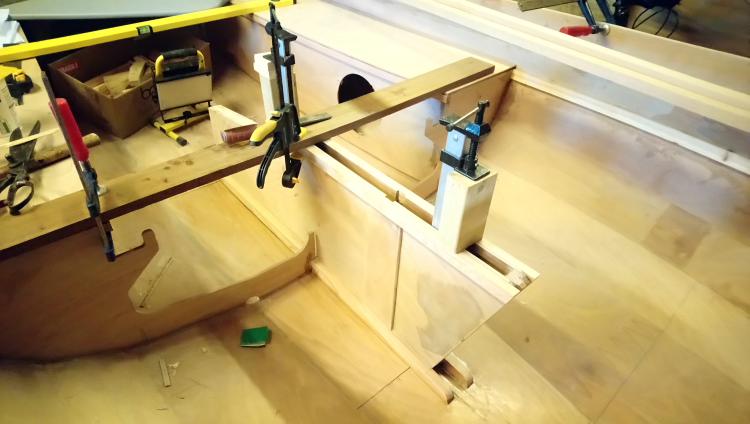 I did this before fitting the main thwart. Mine is hinged in the middle and can be removed. I shaped the logs to match the slight curve in the bottom. I then gave all surfaces a liberal coating of thickened epoxy and slid the case into place. Give the case a slight wiggle back and forth to smoothe the epoxy out. I used two sash clamps down through the bottom of the boat at either end of the slot to prevent any sideways or lateral movement. These were "just tight enough" but not so tight as to squeeze the joint dry. The case is clamped to the horizontal board to ensure it stays vertical and also to check for height. Clean up as much epoxy as you can at this stage filling any voids as you go. You may want to run a router bit along the inside of the slot at a later stage and ensure that everything is properly sealed. And how do I do that? 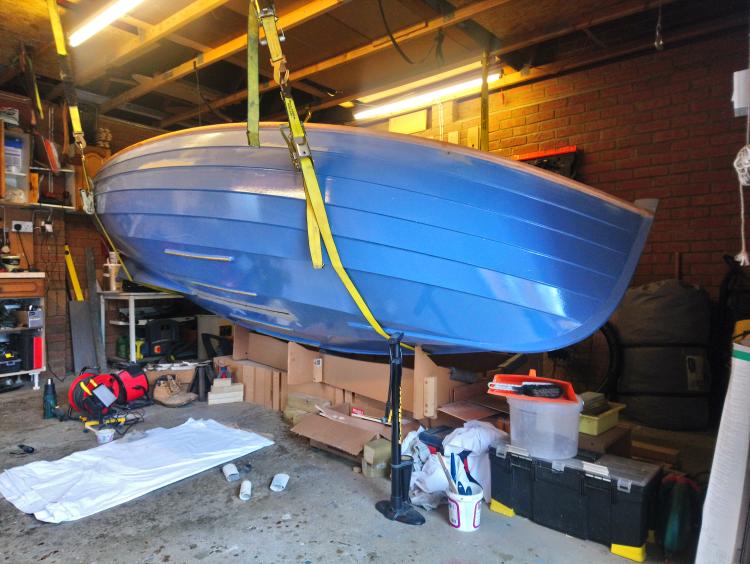 Have fun and good luck.
Graham Neil
https://port-na-storm.blogspot.com/
|
Re: A morbic 12 in the bay of biscay
|
Hi sinfronteras and Graham for the advise, I was also considering the possibility of opening the main bulkhead so that the case could be lowered vertically into the epoxy bed. But on the other hand I see all those photographs of all your boats built without opening that slot, and as a general rule I try to follow closely the architect’s design.
Best regards, Carlos |
|
Administrator
|
Carlos.
One point I remember - Do not stand inside the boat when shaping the undersides of the logs to match the curve of the hull, because if you do, you will be distorting the (still rather flexible) hull shape, and thus you would create a false profile for the logs. Check the plans. Toward the bottom left of the sheet/s called "transverse structure" check "Bulkhead 3". You'll see what is left of frame/bulkhead 3 is cut to fit close around the CB case such that it touches the tops and the sides of the "Logs", (and the CB case). Note also - In the 2017 version of the build manual, see section 6.11. It says; "The case is fully pre-assembled before lay down on board. Cut-out the centreline part of the bulk-head 3 and insert the case. Apply a thick coat of epoxy between logs and sole and screw through the sole to ensure watertightness. Glue the posts 20 X 25 between case and bulkhead 3. Remove excess epoxy before curing. When epoxy is cured, adjust the sole slot which was made voluntarily shorter and narrower. Attention : foot rests are to be fitted after the centreboard case." NB - It says "... and SCREW through the sole to ensure watertightness." Above, "voluntarily" can be assumed to mean "Deliberately". (I would not be inclined to have the main thwart in two setions, so i'll be interested to hear how that modification behaves.) You'll be fine! PW |
Re: A morbic 12 in the bay of biscay
|
Thanks Paul for the advise!! To stand inside would twist the sole plank in the surroundings of the cb slot, even with the fg sheathing on.
I’m not that keen on english language as to understand the differences between voluntarily (a literal translation to spanish would mean something as done with no pressure from others) and deliberately, which I would translate as done on purpose. Anyway I would suppose to mean “a lot of epoxy, plenty of it”, jajaja!!! Best regards, Carlos Herran |
Re: A morbic 12 in the bay of biscay
|
Hi, yesterday after nine months since I started building the morbic 12 design we had a small launching party at our local harbor sailing school, where she will be kept. It has been a very nice construction time, and I have enjoyed it a lot. The quality of Ms. Vivier design is very high, and not difficult for anyone with some wood working skills. I would recommend it to anyone interested in building a traditional styled boat in a modern way. n fact I have ordered the Minahouet study plans, which i see as the closest to the morbic 12 but with one more meter overall…
Cheers, carlos herrán 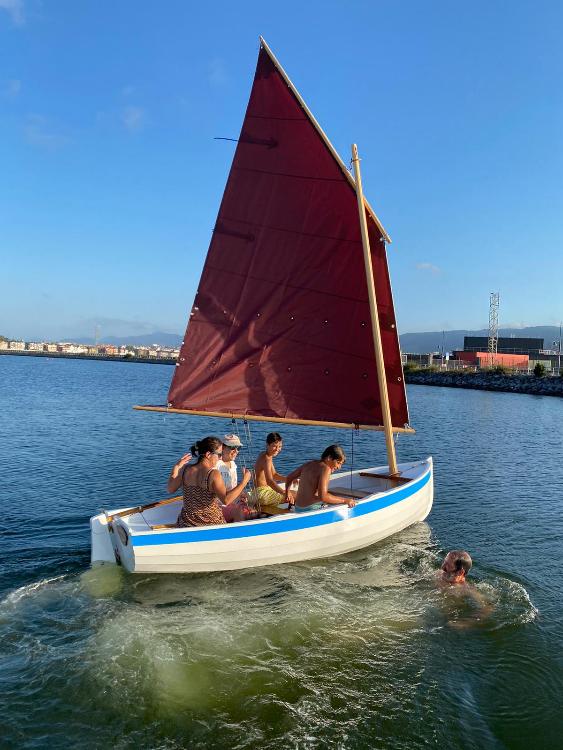
|
Re: A morbic 12 in the bay of biscay
|
Congratulations Carlos,
Well Done. I hope you have many enjoyable sails in her. Regards Graham.
Graham Neil
https://port-na-storm.blogspot.com/
|
|
Administrator
|
In reply to this post by magaliatres
Brilliant Carlos!
Another beautiful boat afloat - You'll find she is not fast but great fun to sail, and comfortable at sea. (On the lake we've even had several people aboard.) May we quote you on the website? - "The quality of Mr Vivier's design is very high, ..... etc .... in a modern way". Stay in touch. Paul W |
Re: A morbic 12 in the bay of biscay
|
Hi Graham and Paul, thanks for your kind words. Yesterday I had my first real sail test and I agree it is not a fast rocket but not that slow either! It takes time to get to know a boat to take her to her to move along.The lug sail is new to me and although from outside of the boat it may seem small, from inside that square piece of canvas fells quite powerful. The tricky part so far has been the launching from the trolley single handed and specially getting her back on the trolley and up the ramp. May it be that I’m not that young anymore? Impossible…
Best regards, Carlos Herrán |
|
Administrator
|
Question - Is your sail laced to the boom?
Reason - We believe we've improved performance by unlacing from the boom. Method - Keep the boom. Unlace the sail from it. Retain the forward lashing. Add; (i) a Clew strap which must be able to slide on the boom (to keep the clew close to the boom); (ii) an adjustable outhaul (to optimise in varying wind strengths); (iii) a boom bridle for the mainsheet, unless you have at least two mainsheet blocks spaced along the boom (to reduce the bending load on the boom which would otherwise be imposed by a single downward pull near the centre). Ideally the sail would have been cut for the purpose, though ours wasn't. We have incorporated a toggle system for when reefing the clew. (Maybe pics available if required). Paul W |
Re: A morbic 12 in the bay of biscay
|
This post was updated on .
Hi paul, I ordered the sail from one of the lofts suggested in Ms. Vivier book, Voilierie Rochard directly from Viviers drawings and it is specified to have eyelets in the foot of the sail. Nevertheless I had not laced the sail to the boom as I also prefer to have it set unlaced as it is easier to use the outhaul to give more or less depth to the bottom part of the sail.
My next task is to set up a reefing system. So far I think I will try to keep it as simple as possible: a snap hook laced to the boom end and some loops or softshackles in the tack eyelets, and have a snap hook fitted to the the outhaul purchase to the get the sail foot tensioned. I deliverately have made my boom 25 cm longer than specified to try end boom sheeting as well as mid boom sheeting with two blocks or a bridle. I love to play with sail systems. Best regards, Carlos Herrán 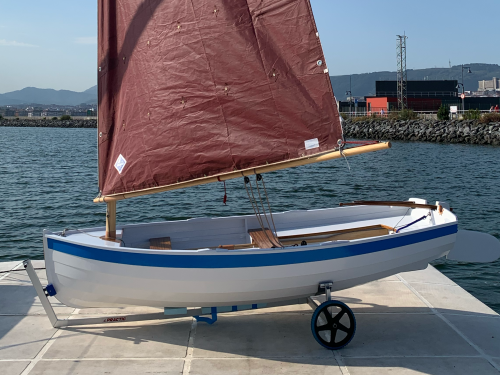 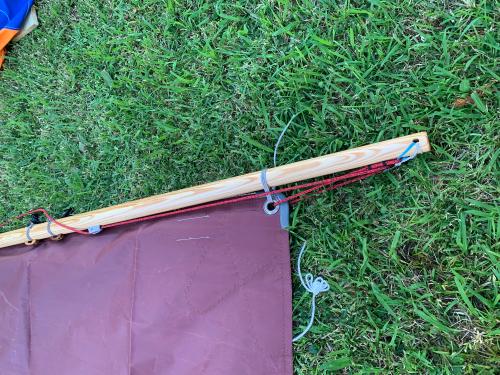
|
«
Return to MyMorbic Sail-&-Oar Dinghy UK Network
|
1 view|%1 views
| Free forum by Nabble | Edit this page |

